Address Validation catches shipping address errors before orders are fulfilled. It reduces failed deliveries, lowers return rates, and cuts address-related support tickets.
It uses two systems that work together:
System | What it does | Cost |
Verifiers | Check addresses against official postal databases (powered by Experian) across 195+ countries. Confirm the address is real and deliverable. | Pay per validation, starting at $0.01 USD. |
Validation rules | Run instant format checks in the browser as customers type. Catch missing house numbers, restricted regions, special characters, and more. | Free, unlimited use. |
Validation rules run first to catch formatting issues (free). Once those pass, verifiers check the address against postal data (paid). Together, they give customers real-time feedback without slowing down checkout.
For a full breakdown of how it works, features, and pricing, see What is Address Validation.
🔒 Shopify Plus: Checkout validation (where customers see suggestions before they pay) requires Shopify Plus with checkout extensibility. Post-purchase validation on the Thank You Page and Order Status Page works on all Shopify plans.
Verifiers are billed per validation through Shopify. You need to accept usage charges before you can publish a verifier.
In the Order Editing app, go to Address Validation.
Click Create verifier.
You'll see a yellow banner: "Usage-based subscription required." Click Configure usage charges.
Follow the Shopify prompts to approve the usage charge.

ℹ️ Note: Shopify bills you when you reach $200 in usage. Each charge is transparent, and you can see exactly which addresses were validated in your Shopify admin under Settings > Billing.
The usage cap is your maximum monthly spend on address verification. It protects you from unexpected costs.
On the Address Validation dashboard, click Adjust usage cap.
Use the slider to set your monthly budget.
Review the estimate below the slider. It shows roughly how many addresses your budget will cover based on your country mix.
Address Validation recommends a budget based on your actual order volume from the last 30 days. For example, if you average 3 validations per order and had 92 orders last month, it'll suggest a cap that covers that volume.
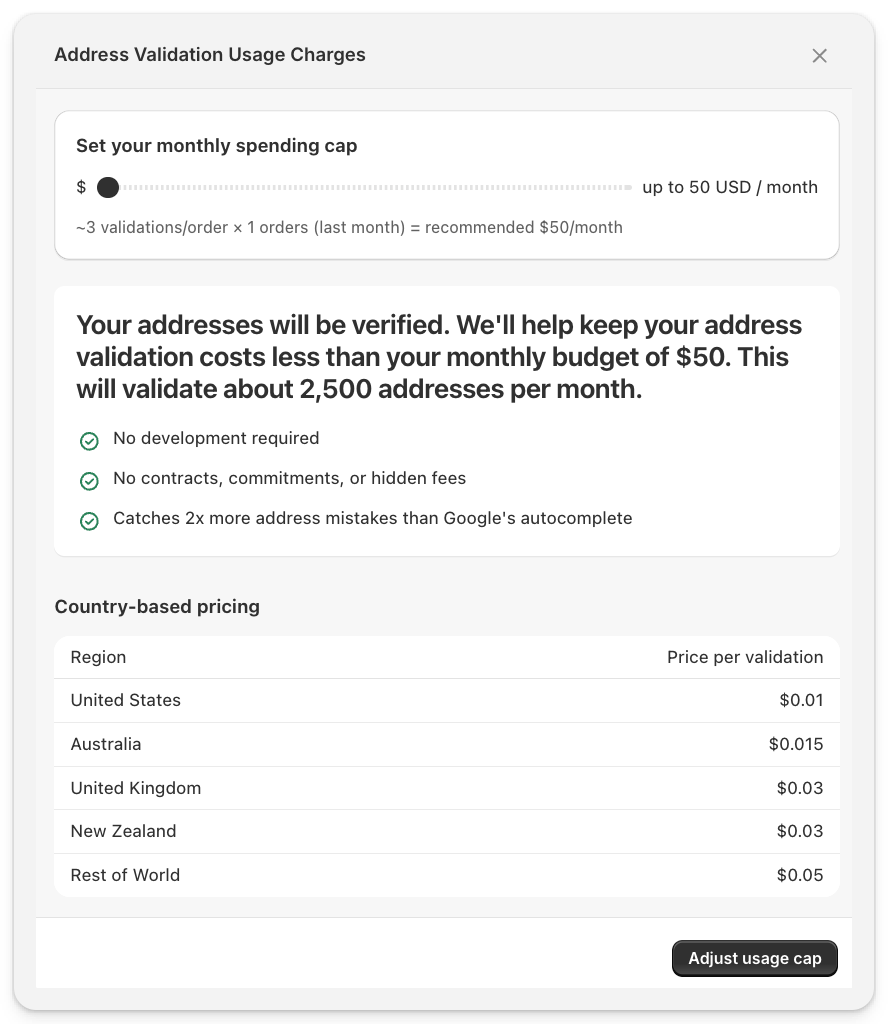
💡 Tip: Start with the recommended cap. If you reach your limit, verification pauses but checkout continues to work normally. You can increase the cap anytime to resume.
A verifier checks customer addresses against official postal databases to confirm they're deliverable. It runs in under 600ms and loads asynchronously, so checkout performance is unaffected.
Go to Address Validation and click Create verifier.
Enter a Name for internal reference (customers won't see this).
Set the status to Active when you're ready to go live, or leave it as Draft to configure first.
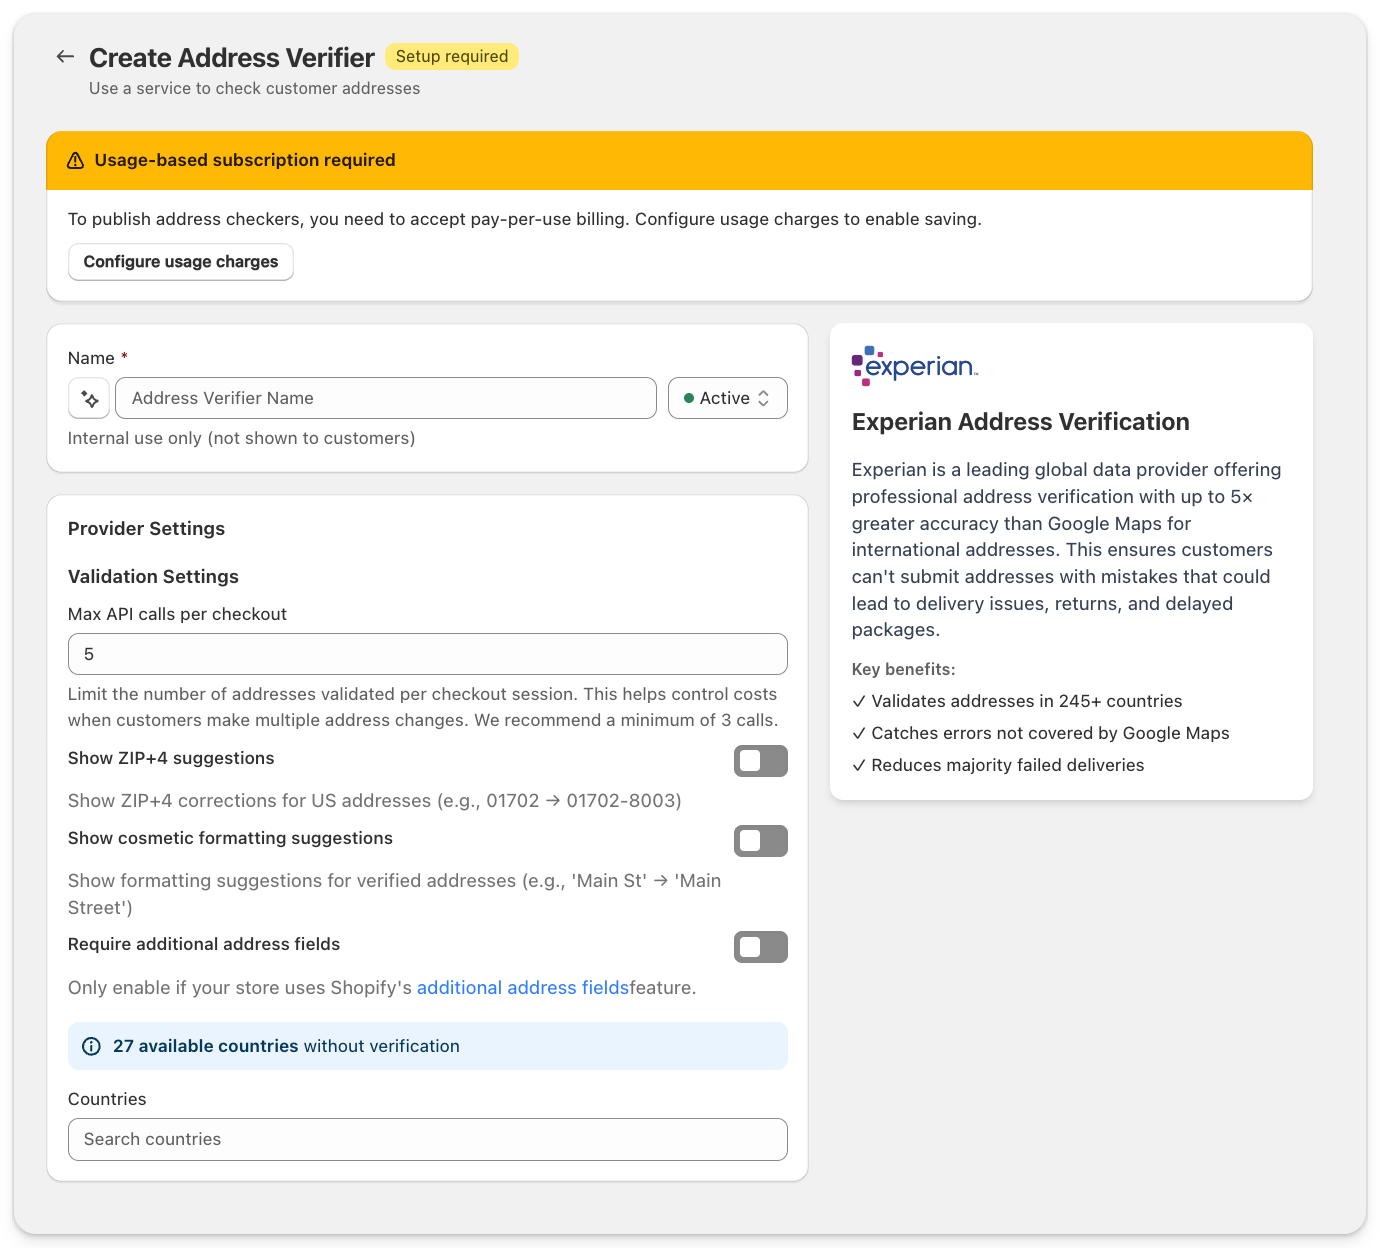
Select the countries you ship to. The verifier will only validate addresses for the countries you choose. Use the search field to find and add countries quickly.
You can create separate verifiers for different country groups. For example, one verifier for the US and Canada with specific settings, and another for the rest of the world.
Configure how the Experian verification engine behaves:
Setting | What it does | Recommended |
Max API calls per checkout | Limits how many times an address is validated in a single checkout session. Prevents runaway costs when customers edit their address multiple times. Previously validated addresses use a cache, so re-entering the same address doesn't count. | 5 (minimum 3) |
Show ZIP+4 suggestions | For US addresses, suggests the full 9-digit ZIP code (e.g. 01702 becomes 01702-8003). Most stores don't need this. | Off |
Show cosmetic formatting suggestions | Suggests formatting improvements like "Main St" to "Main Street." These are cosmetic only and don't affect deliverability. | Off |
Require additional address fields | Only enable this if your store uses Shopify's additional address fields feature. | Off unless needed |
Under Advanced Settings, open Surface Settings to control where your verifier is active.
Option | What it does | Plan required |
Both checkout and post-purchase (recommended) | Validates at checkout and again on the Thank You Page and Order Status Page. Maximum coverage. | Shopify Plus |
Checkout only | Validates before purchase only. No post-purchase suggestions. | Shopify Plus |
Post-purchase only | Validates on the Thank You Page and Order Status Page after purchase. | All plans |
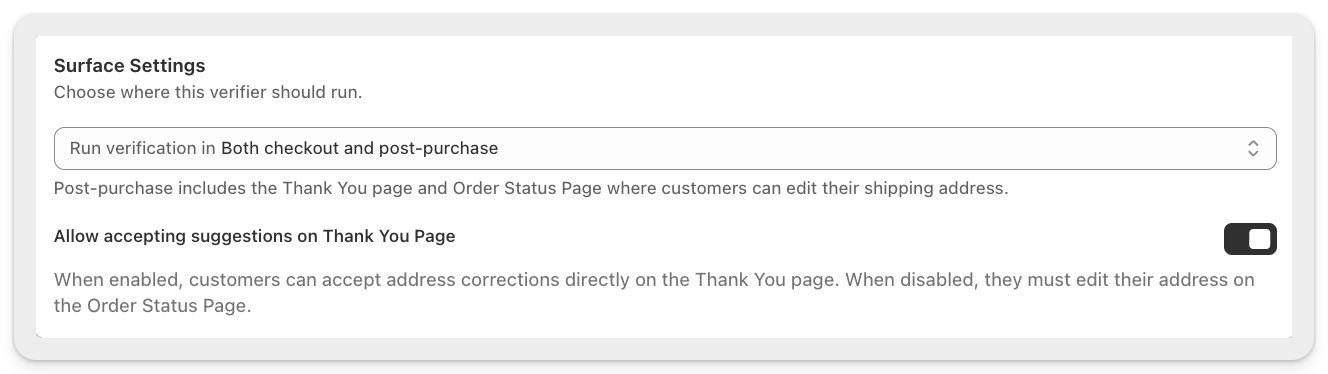
When this toggle is on, customers can accept address corrections directly on the Thank You Page with one click. When it's off, they'll need to go to the Order Status Page to edit their address.
We recommend turning this on. It gives customers the fastest path to fixing their address right after checkout.
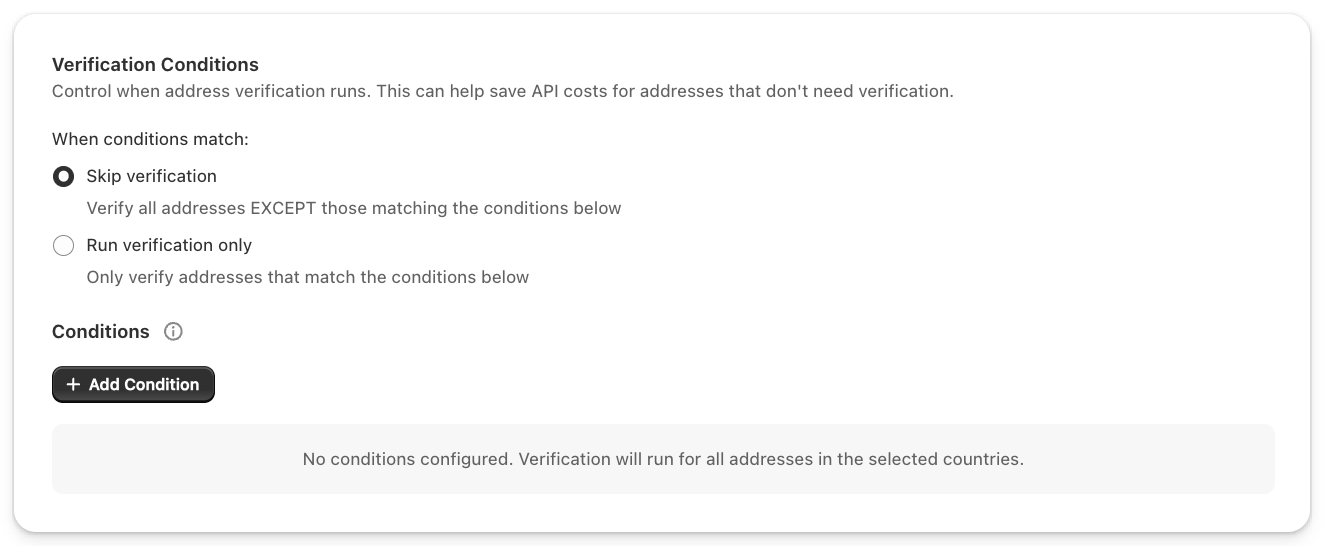
Conditions let you control when verification runs. This helps reduce costs by skipping verification for addresses that don't need it.
Under Advanced Settings, open Verification Conditions. Choose one of two modes:
Skip verification verifies all addresses except those matching your conditions. Use this to exclude trusted segments (e.g. repeat customers, domestic orders).
Run verification only verifies only addresses that match your conditions. Use this to focus on high-risk orders (e.g. orders over a certain value, international shipments). Click + Add Condition to select from 16 available condition types including order total, shipping country, shipping method, and customer tags.
For full details on each condition, see Verification conditions and cost control.
Some settings are configured in the Shopify checkout editor rather than in the Order Editing app. These settings control how the Address Validation block behaves in checkout. Your verifiers, validation rules, messages, conditions, and usage caps are still configured in Order Editing.
Go to Shopify admin > Settings > Checkout.
Click Customise next to your checkout configuration.
Find the Address Validation block in the sidebar.
Setting | What it does | Recommended |
Allow app to block checkout | Enables the Error (Blocks Checkout) option for validation rules. When this is on, rules set to Error can prevent checkout until the customer fixes the issue. Verifiers still suggest corrections and do not block checkout on their own. | Off to start. Turn on only when you are ready to enforce blocking validation rules. |
Include block in Shop Pay | Extends address validation to Shop Pay checkouts. It also helps the block appear in express checkout flows that support checkout extensions. | On |
Automatically expand sections to show app | Auto-expands the validation section so customers can see validation results without clicking to expand the section manually. | On |
Show confidence | Displays a confidence level on address corrections. | On if you want customers to understand how strong a suggestion is. |
Enable logs | Turns on browser console logs for troubleshooting. | Off in production. Turn on only while testing with support. |
Language | Previews a locale in the checkout editor. | Use this to review translated text. The live checkout language follows Shopify and the customer context. |
⚠️ Warning: Only turn on Allow app to block checkout after testing your validation rules. Blocking rules can stop customers from completing checkout until the rule condition is resolved.
ℹ️ Note: The checkout editor settings do not choose which addresses are validated or when verifiers run. Those controls live in the Order Editing app under your verifier and validation rule settings.
Validation rules run instant, free format checks before the verifier runs. They catch common issues like missing house numbers, restricted regions, and special characters without costing you anything.
Go to Address Validation > Validation Rules.
Click Create rule.
Select one or more triggers (15 types available, including Missing House Number, Shipping Country, ZIP Code Range, Field Contains Text, and Field Matches Pattern).

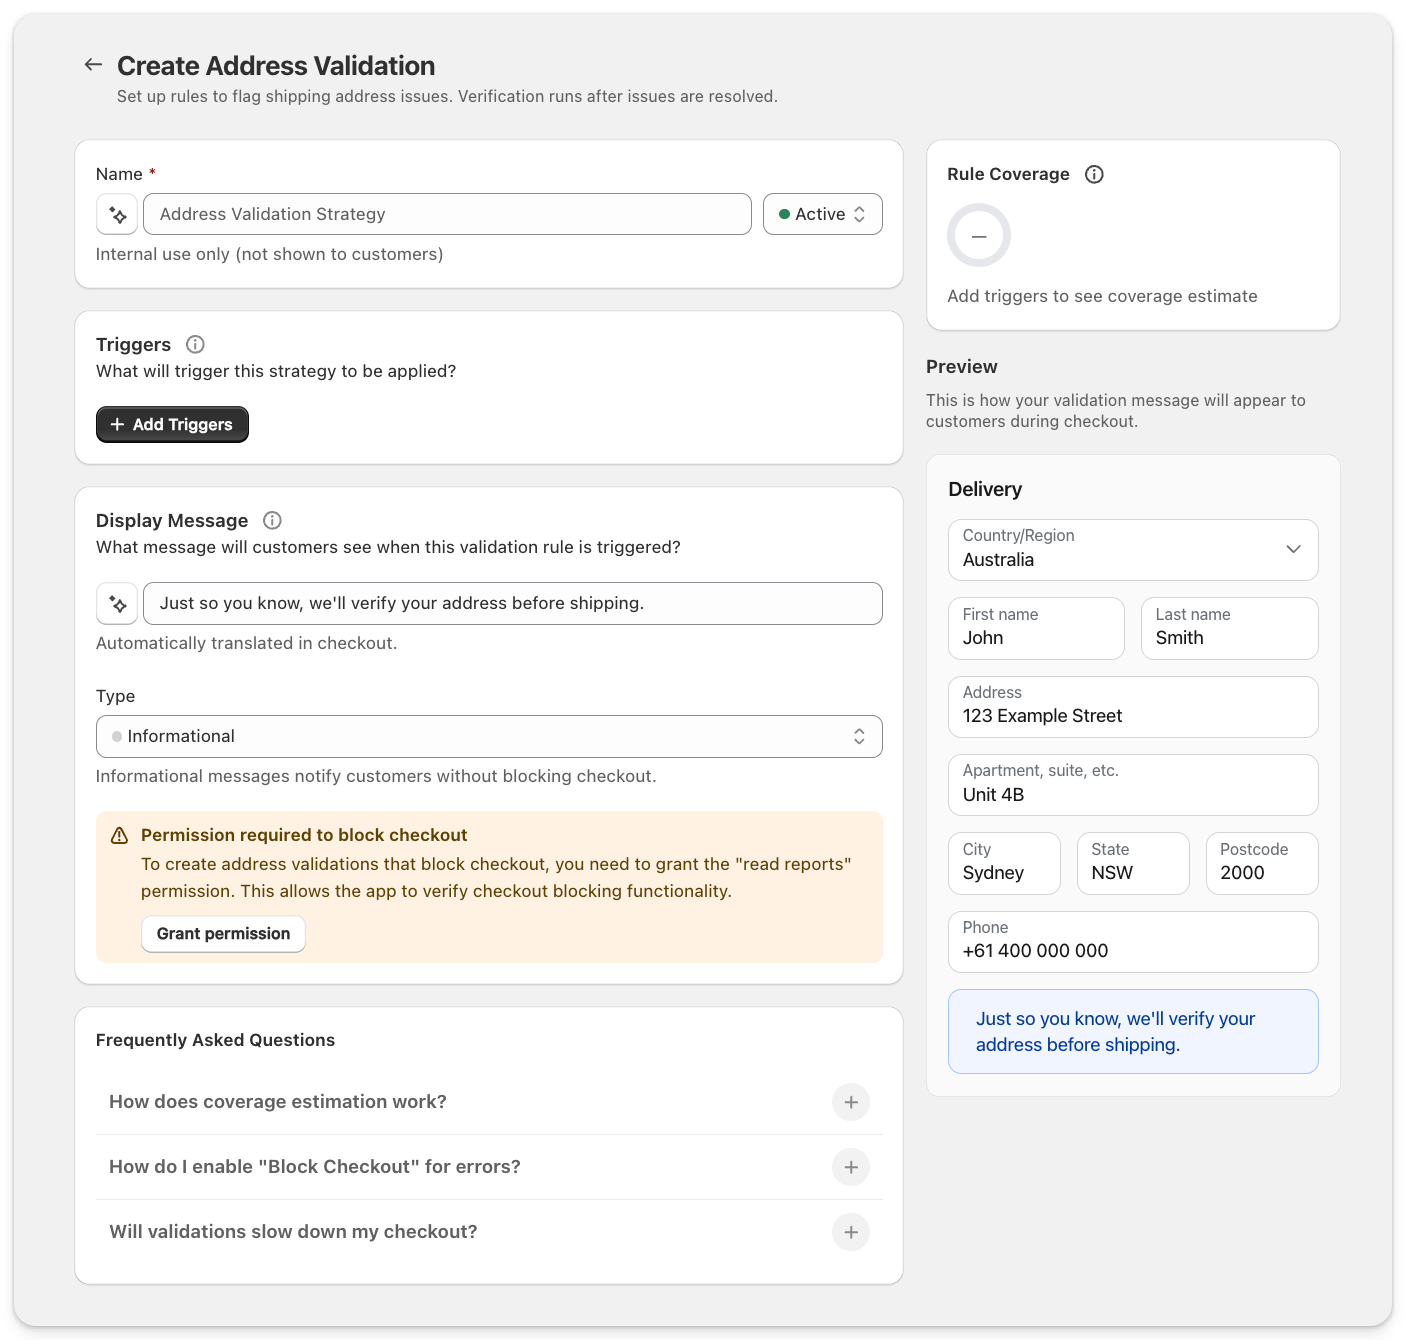
4. Choose a message type:
Type | Behaviour | Preview |
Informational | Displays a message. Doesn't block checkout. | 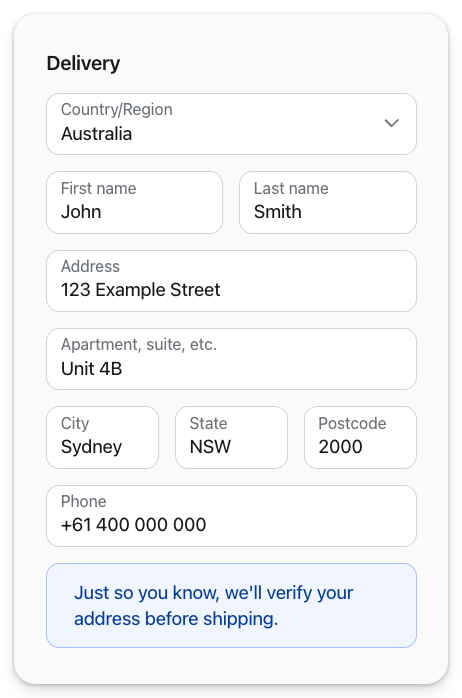 |
Warning | Displays a prominent message. Doesn't block checkout. |  |
Error (Blocks Checkout) | Displays a message and prevents checkout until the customer fixes the issue. Requires "Allow app to block checkout" to be enabled in the checkout editor. | 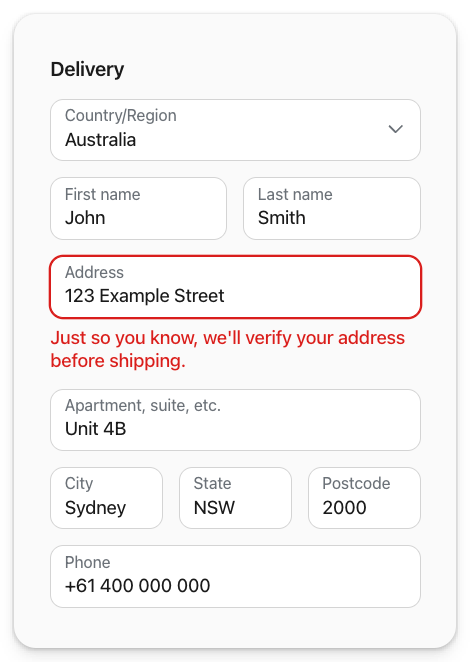 |
Write the message your customers will see.
Set the status to Active and click Save.
For a full guide to triggers, logic, and examples, see Validation rules.
💡 Tip: Rules are free and run before verifiers. Adding rules for your most common address issues saves you money by catching problems before a paid verification runs.
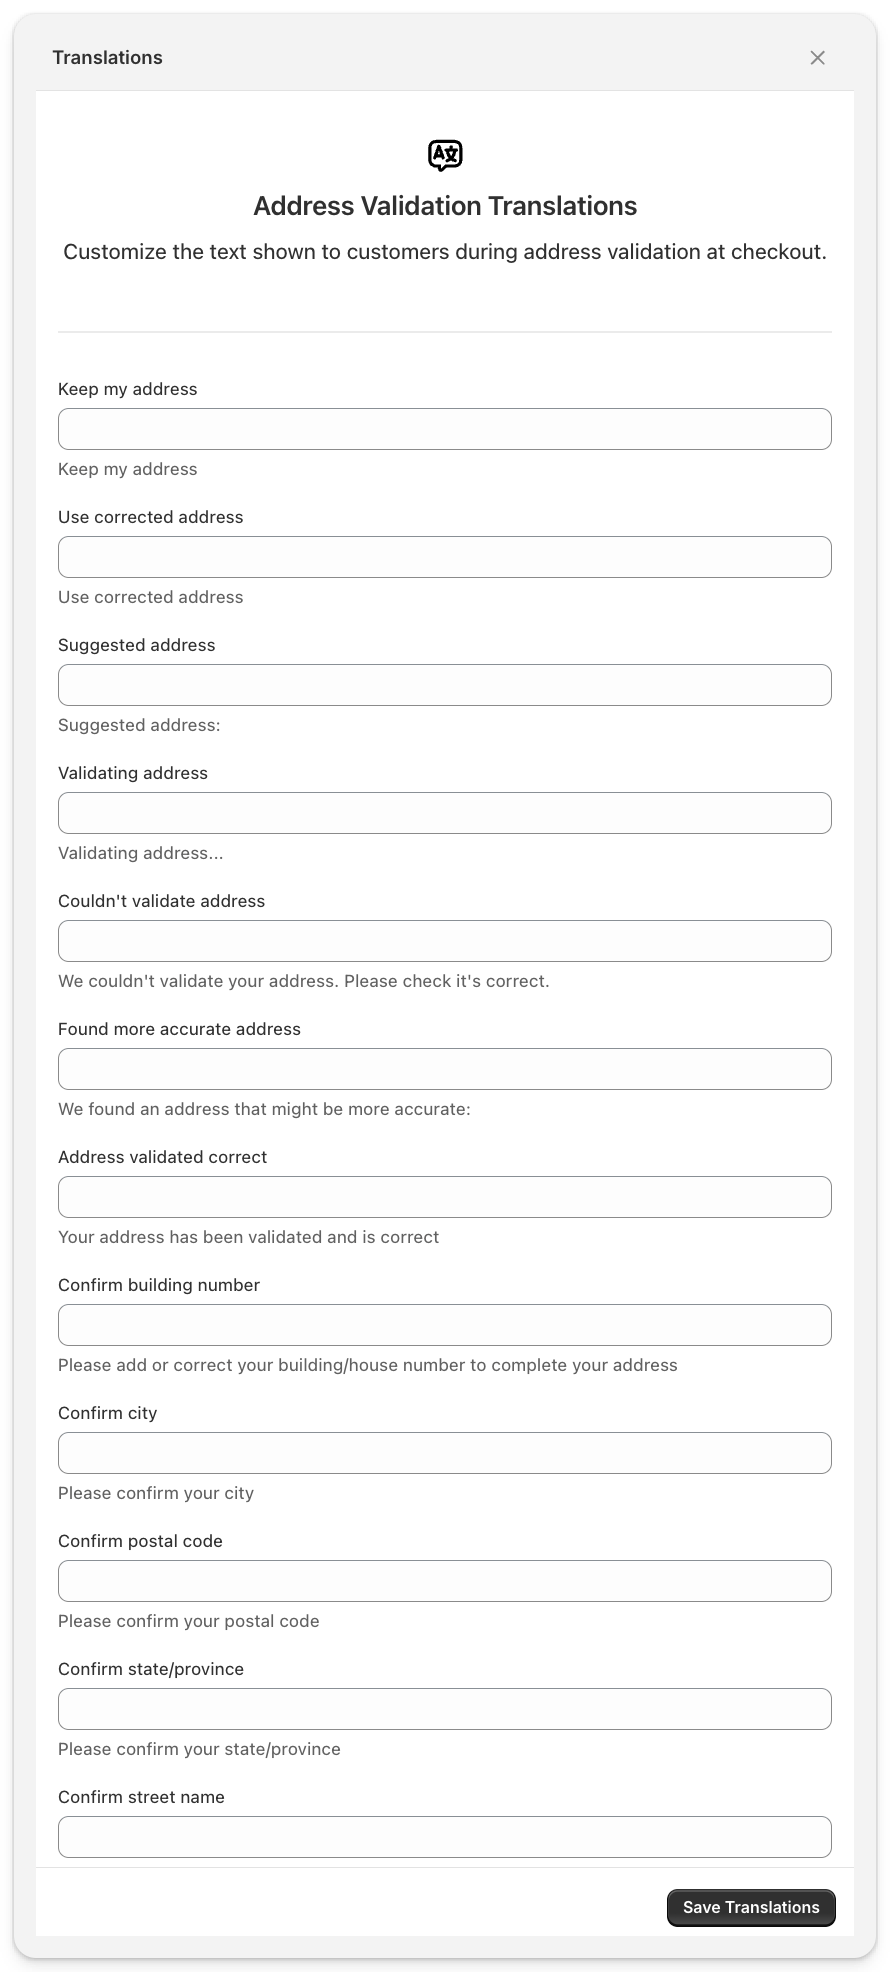
All customer-facing messages can be translated into any language your store supports.
Go to Address Validation settings.
Click Translate in the title bar.
Add translations for each language.
Translatable strings include "Keep my address," "Use corrected address," "Validating address...," and all custom validation rule messages. Checkout translations apply automatically when the customer's browser language matches.
In the Order Editing app, make sure your verifier status is set to Active.
Click Save.
In the Shopify checkout editor, click Save to apply your block settings.
✅ Success: Your verifier is now live. Place a test order to confirm validation is working.
After publishing, run a quick test to confirm everything is set up correctly.
Open your store in a new browser window (or use incognito mode).
Add a product to cart and proceed to checkout.
Enter a shipping address with a deliberate error (e.g. a misspelled street name or wrong ZIP code).
Confirm that a suggestion appears asking the customer to correct their address.
Accept the suggestion and verify the corrected address is applied.
Complete the order and check the Thank You Page for post-purchase validation (if enabled).
If you enabled validation rules, test those too by entering an address that should trigger your rule (e.g. an address missing a house number).
💡 Tip: Turn on Enable logs in the checkout editor during testing. You can inspect the browser console to see validation requests and responses in real time. Turn it off when you're done.
For a full testing walkthrough, see Testing your Address Validation setup.
When a customer enters their shipping address, Address Validation responds with one of four results:
Result | What the customer sees |
Verified | A green confirmation: "Your address has been validated and is correct." |
Suggestion | A corrected address with two options: "Use corrected address" or "Keep my address." The customer always has the final say. |
Clarification | A prompt asking the customer to check specific fields (e.g. street number, apartment). Multiple possible matches were found. |
Not found | A message that the address couldn't be verified. The customer can review their details or keep their original address. |
Customers can always override suggestions and proceed with their original address. Verification never blocks checkout unless you've configured a validation rule with the Error type. If the verification service times out or fails, checkout continues normally.
Now that Address Validation is live, here are the next steps to get the most out of it:
Set up validation rules. If you haven't already, create rules to catch common formatting issues before they hit the verifier. Rules are free and reduce your verification costs. See Validation rules.
Fine-tune your conditions. Once you've been running for a few days, review your analytics and add conditions to skip verification for segments that rarely have bad addresses. See Verification conditions and cost control.
Review your analytics. Check the Address Validation analytics dashboard to see how many addresses are being validated, how many suggestions customers accept, and your estimated cost savings. See Address Validation Analytics.
No. Validation loads asynchronously and is sandboxed, so checkout performance is unaffected. Verifiers typically return results in under 600ms.
Verifiers never block checkout. If the verification service times out or fails, checkout proceeds normally and the status is recorded for your review. Only validation rules set to the "Error" type can block checkout, and only if you've enabled the "Allow app to block checkout" permission in the checkout editor.
Yes. Customers can always override suggestions and proceed with their original address. Address Validation is designed to suggest, not force.
Yes. Address Validation works with Shop Pay, Apple Pay, and other express checkout methods. Enable "Include block in Shop Pay" in the checkout editor to activate it. Validation displays in a mobile-optimised view on all devices.
Yes. You can create separate verifiers for different country groups with different settings. For example, one verifier for US and Canada, and another for the rest of the world.
Validation rules are optional but recommended. They catch formatting issues before the verifier runs, which saves you money (rules are free) and gives customers faster feedback. See Validation rules to learn more.
Verification pauses automatically. Checkout continues to work normally without validation. Increase your cap anytime to resume.
Set your verifier status to Draft in the Order Editing app, or remove the Address Validation block from the Shopify checkout editor. No code changes needed.
Yes. The analytics dashboard shows total addresses corrected and validation success rates. Individual order details in your Shopify admin show whether each address was validated and corrected. See Address Validation Analytics.
Go to Address Validation settings and click Translate in the title bar. You can add translations for every customer-facing string, including "Keep my address," "Use corrected address," and all custom validation rule messages.
